
Friday has rolled around again and the Flourishes Design Team has a treat for you today! We're digging into the Flourishes vault to showcase some of our sets that are retiring! As we make room for new, it means we need to clear out some of these beauties. So - if you like what you see along the way - be sure to add them to your shopping cart, because once they're gone - they're gone for good!
It always feels a little sad to say goodbye to some beautiful sets we've loved so well - so I know the Design Team will show them off wonderfully and you'll be inspired!
Drop by and see:
- Allison Cope - you are here!
- Christine Okken
- Cindy Lawrence
- Heather Jensen
- Maki Jones
- Silke Ledlow
- Stacy Morgan
- Tosha Leyendekker
Howdy all! TGIF!!! My son has today off of school but my husband goes back to work this morning so it will just be my little guy and me for the next 10 days. Fun, fun, fun!
I've been itching to do something with glitter... I mean, who can resist glitter right? So I grabbed some glitter and some other simple supplies and made myself a glitter window card!

For my card today I used my favourite cardstock, Flourishes Classic White cardstock and I added some simple embossed lines using my Scor-Buddy.
To begin making my focal image, I stamped my beautiful roses window from the Beauty Within stamp set using StazOn ink onto some Clear Cover Cardstock.

I flipped my inked side of the clear cover cardstock to the back and then I took my Glossy Accents and filled in only the roses. I was careful to stay within my lines.

Next I sprinkled on my fine glitter. For my roses, I used 2 tones of red glitter, one more orangey then the other. (Sorry... It's very hard to see the difference in the photo.) I made sure to brush off any stray glitter particles before going on to the next area.
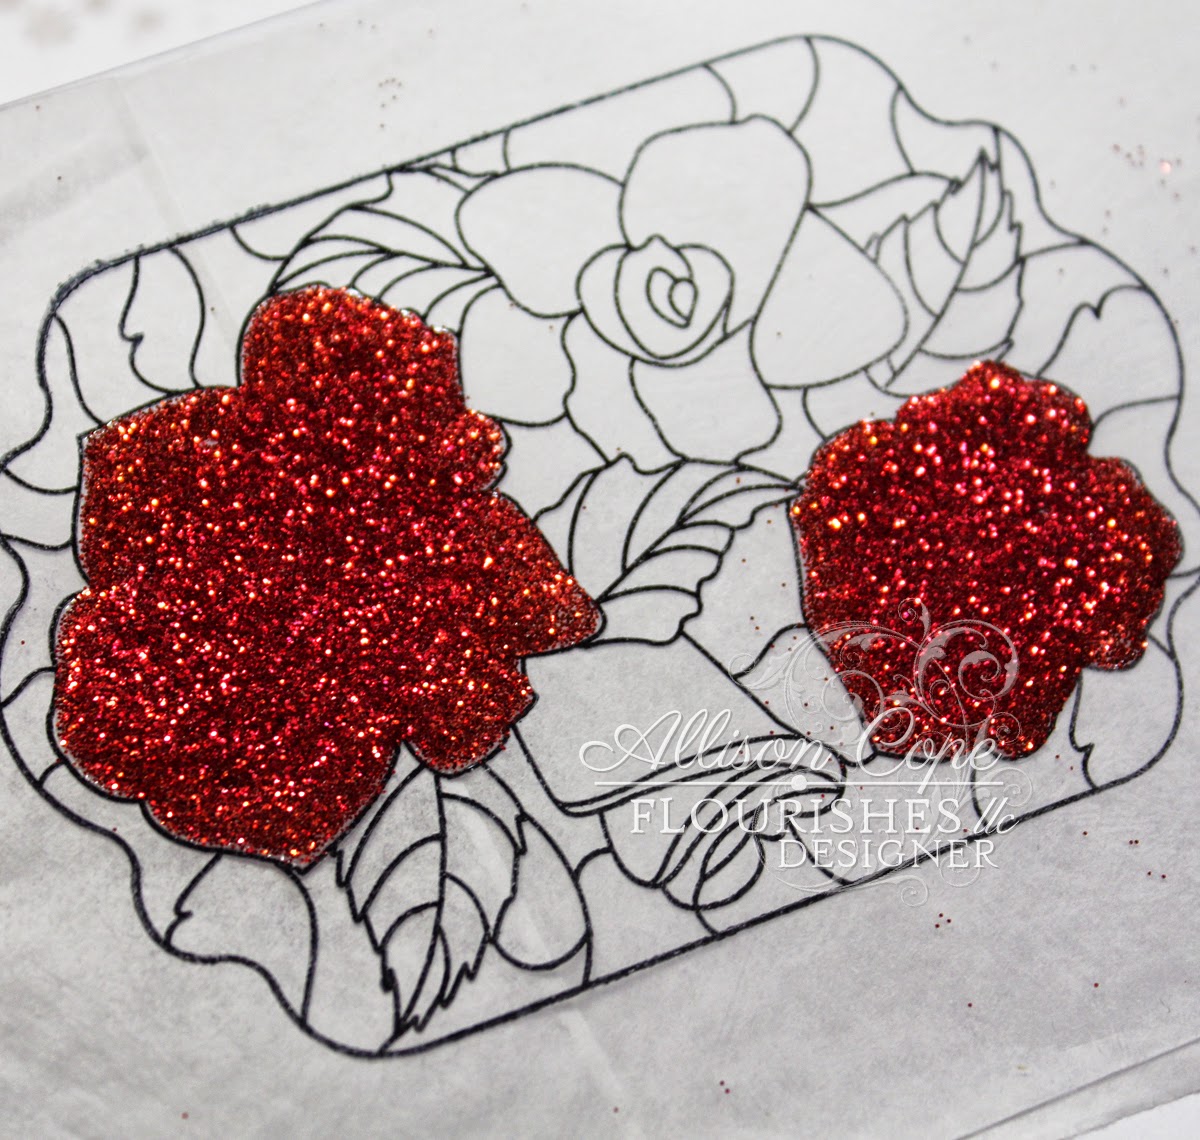
Then I went on to add Glossy Accents to the pink roses, then the green leaves and then finally to the background. Each time I used 2 tones of colour for added depth.
I sure hope enjoyed my simple and EASY tutorial on ho to make a glittered image. Try on your next card... maybe for Halloween!
Christine Okken is next on the list today. Make a stop and visit her blog for more retiring stamp set inspiration!
~ Ally ~
Sponsored by: Flourishes LLC
Supplies:
stamps: Flourishes (Beauty Within)
cardstock: Flourishes Classic White
die cut shapes: Spellbinders
glitter: Martha Stewart
glitter ribbon: Micheals
tools: Scor-Pal
ink: StazOn
pearls: Recollections.


10 comments:
This is beautiful. I have never seen this technique for using glitter! Love it.
What a beautiful job you did on this one Ally! The glittery roses are gorgeous. Such great technique with this set!
Classy white on white with the splash of color for your flowers.
Oh my Ally! Your stained glass roses are gorgeous!! Love your framing and textured white bg!!
So beautiful. Thanks for the tutorial.
This is BEAUTIFUL! TFS it and the tutorial.
I have some lonely unused glitter and will need to try this out.
Crafty hugs,
D~
designsbydragonfly.blogspot
Lovely! Now I need to buy some glitter so I can try this. Thanks for the inspiration!
Your stained glass roses are absolutely gorgeous. Thank you for adding a tutorial too.
Can you tell me what Spellbinder die you used?
Thank you for sharing your lovely card!
This is so gorgeous and love what you did with glitter! I know it was a lot of work but the result is stunning!
Oh...WOW...this is so sparkly!!!! I love it!!! Hugs ~S~
Post a Comment